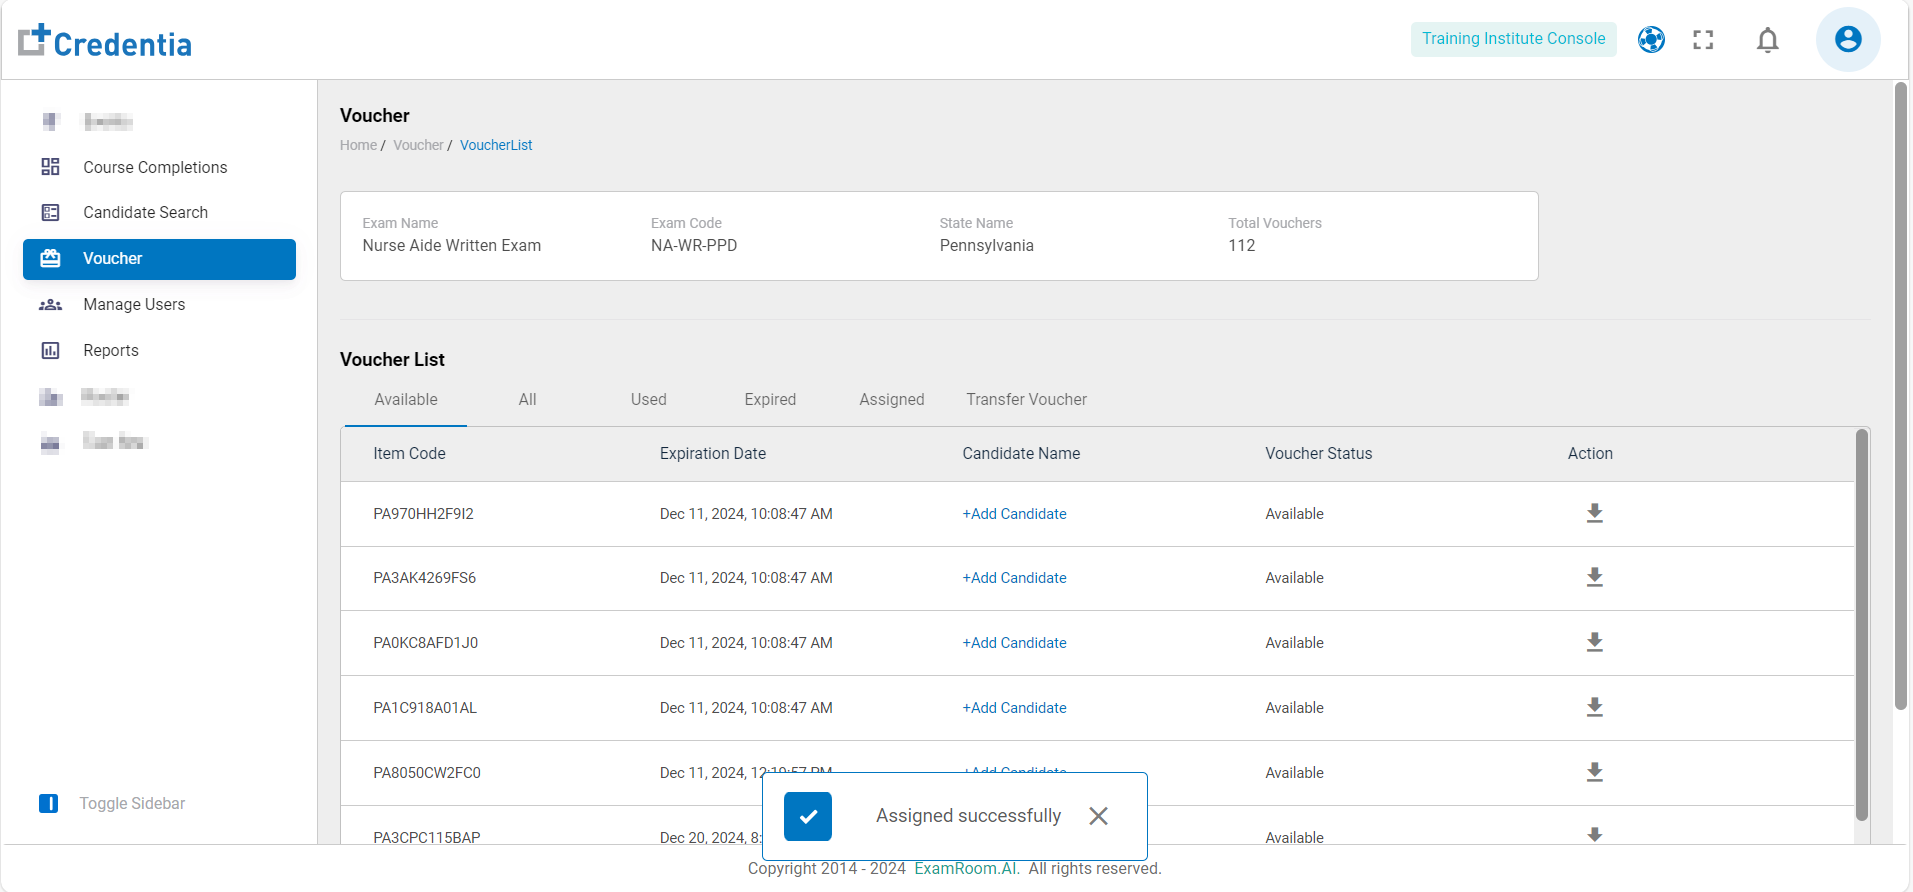
Assigning Voucher
- Click on the preferred voucher name to assign it to the candidate from the list of vouchers.
- The information about the voucher including the exam name, exam code, state name, and total vouchers is available at the top panel.
- The Voucher List displayed has options to view the following vouchers:
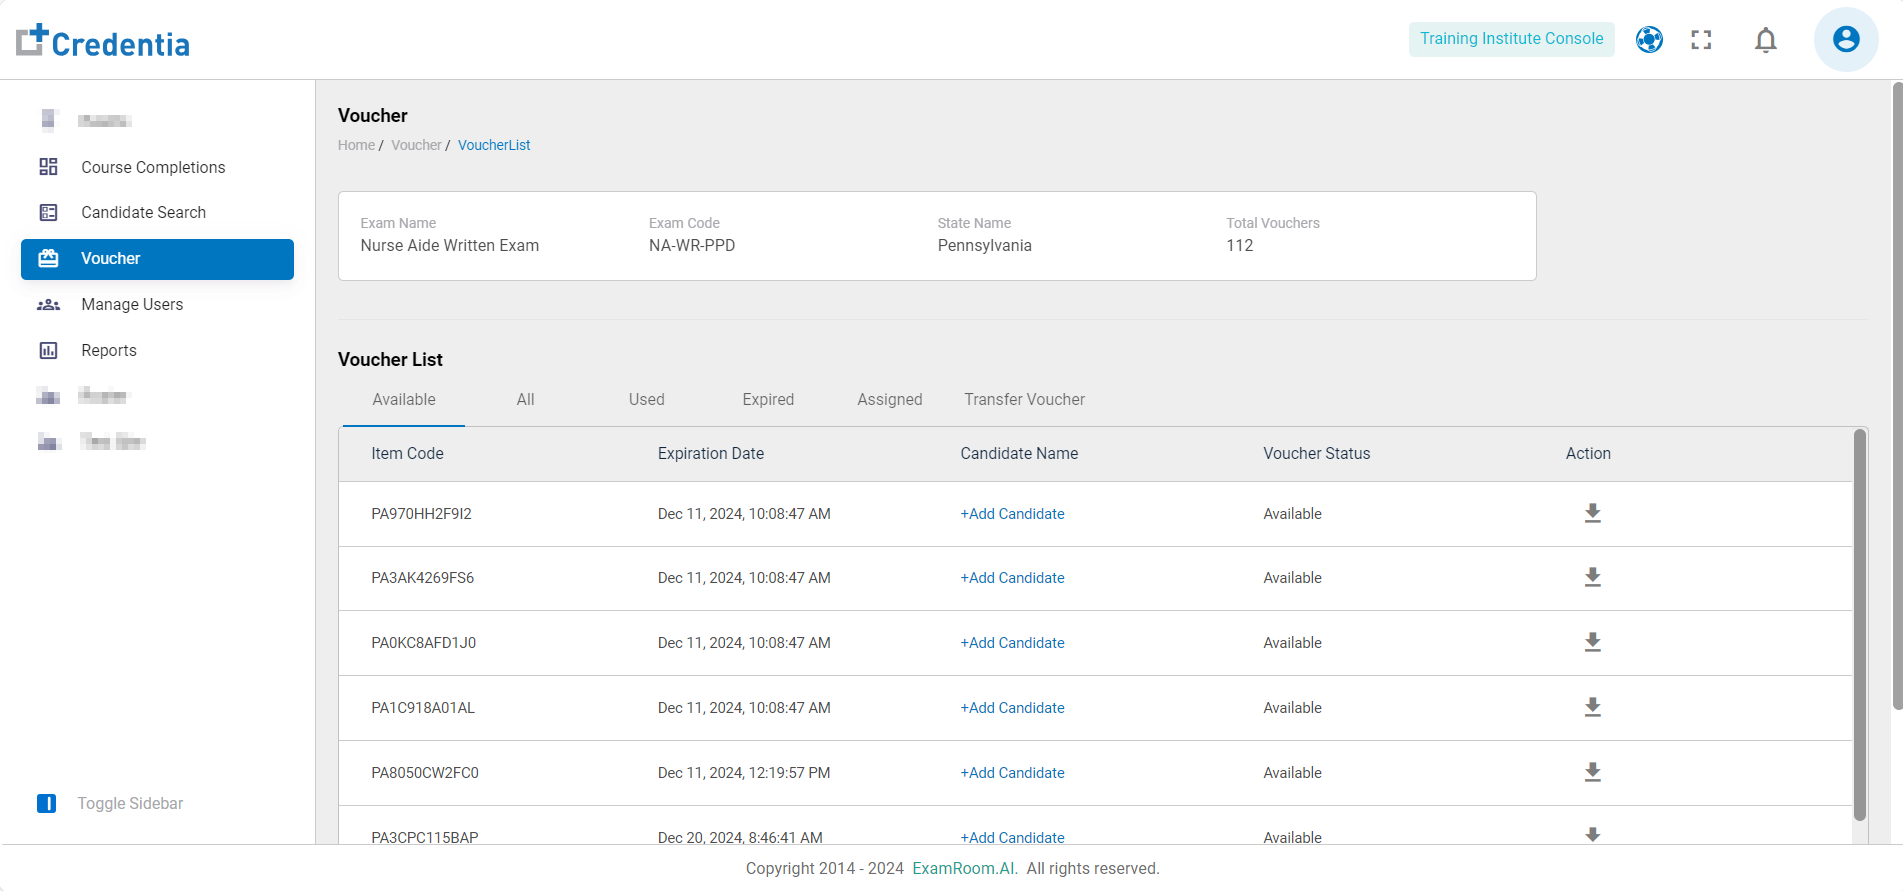
- Available Vouchers: This gives information about the available vouchers. The details of the available vouchers are as follows:
- Item Code: The code number of the voucher.
- Expiration Date: The date and time when the voucher loses its validity. (The voucher validity will be one year from the date of purchase)
- Candidate Name: This is for the display of the candidate’s name, but this is not assigned in the available voucher category.
- Voucher Status: The current status of the voucher.
- Action: The action available on the available vouchers.
- Download: Click to download the spreadsheet giving the information about the voucher code and expiration date.
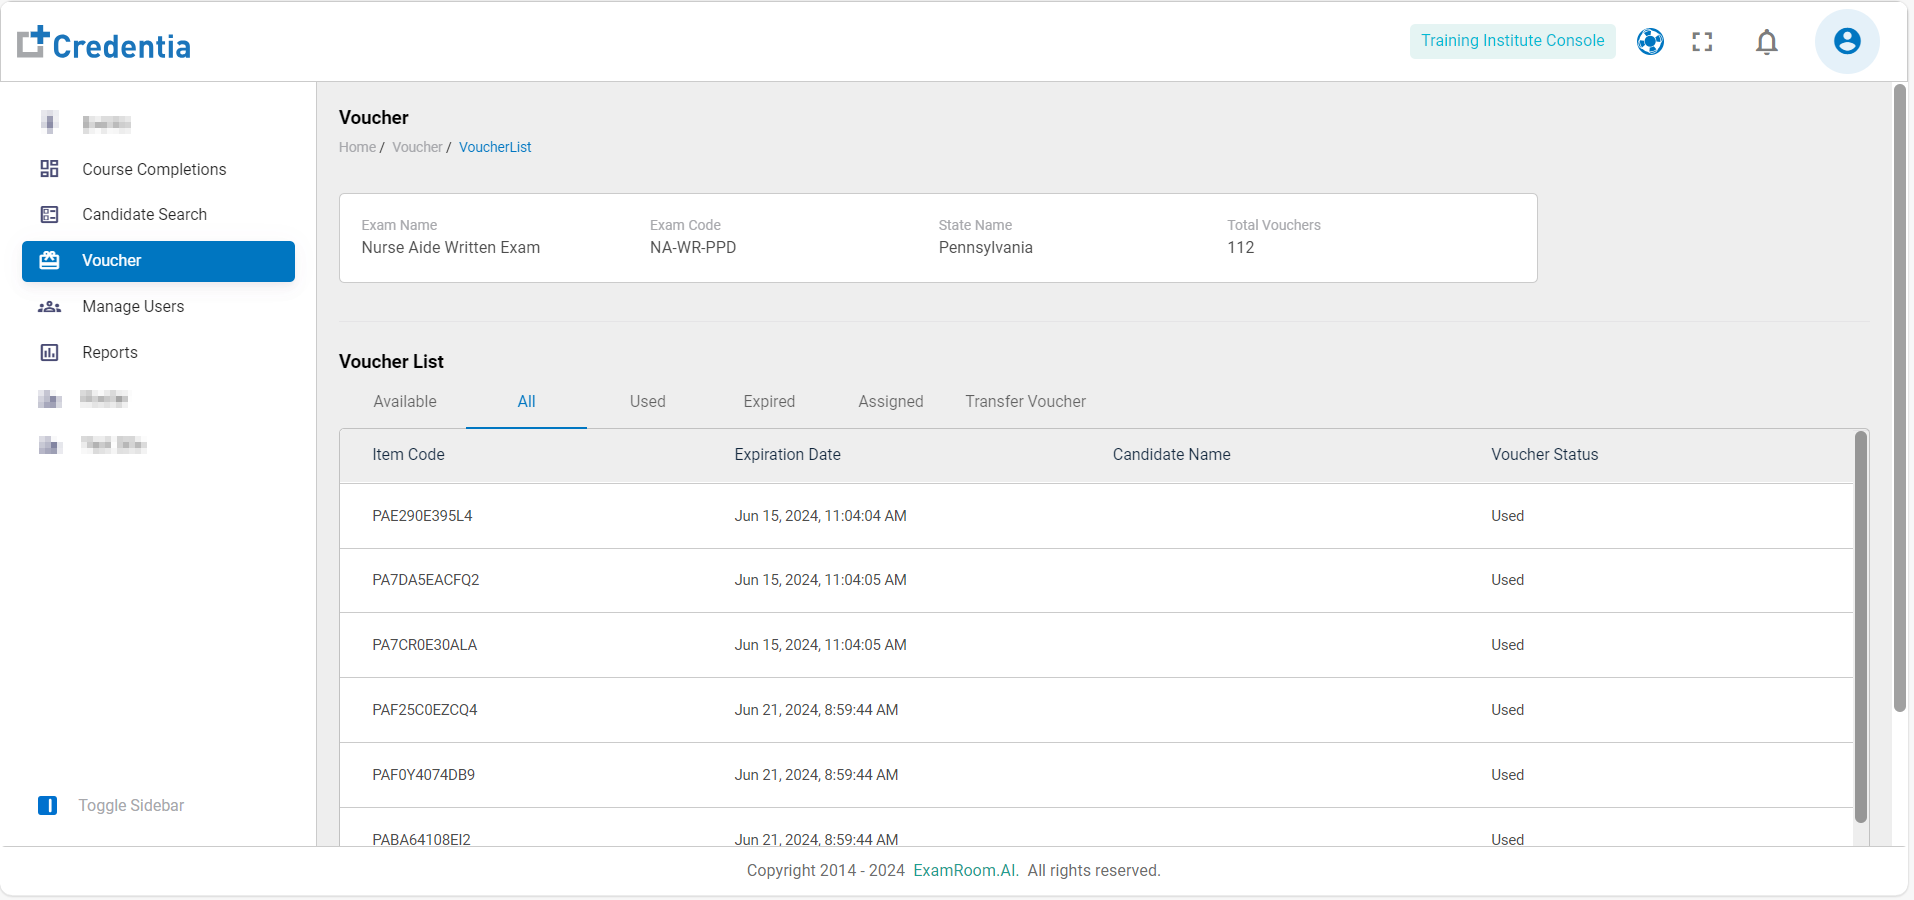
- All Vouchers: This gives information about all the vouchers. The details of the all vouchers are as follows:
- Item Code: The code number of the voucher.
- Expiration Date: The date and time when the voucher loses its validity. (The voucher validity will be one year from the date of purchase)
- Candidate Name: This is for the display of the candidate’s name, but this contains both assigned and unassigned voucher data and is not displayed for the unassigned.
- Voucher Status: The current status of the voucher.
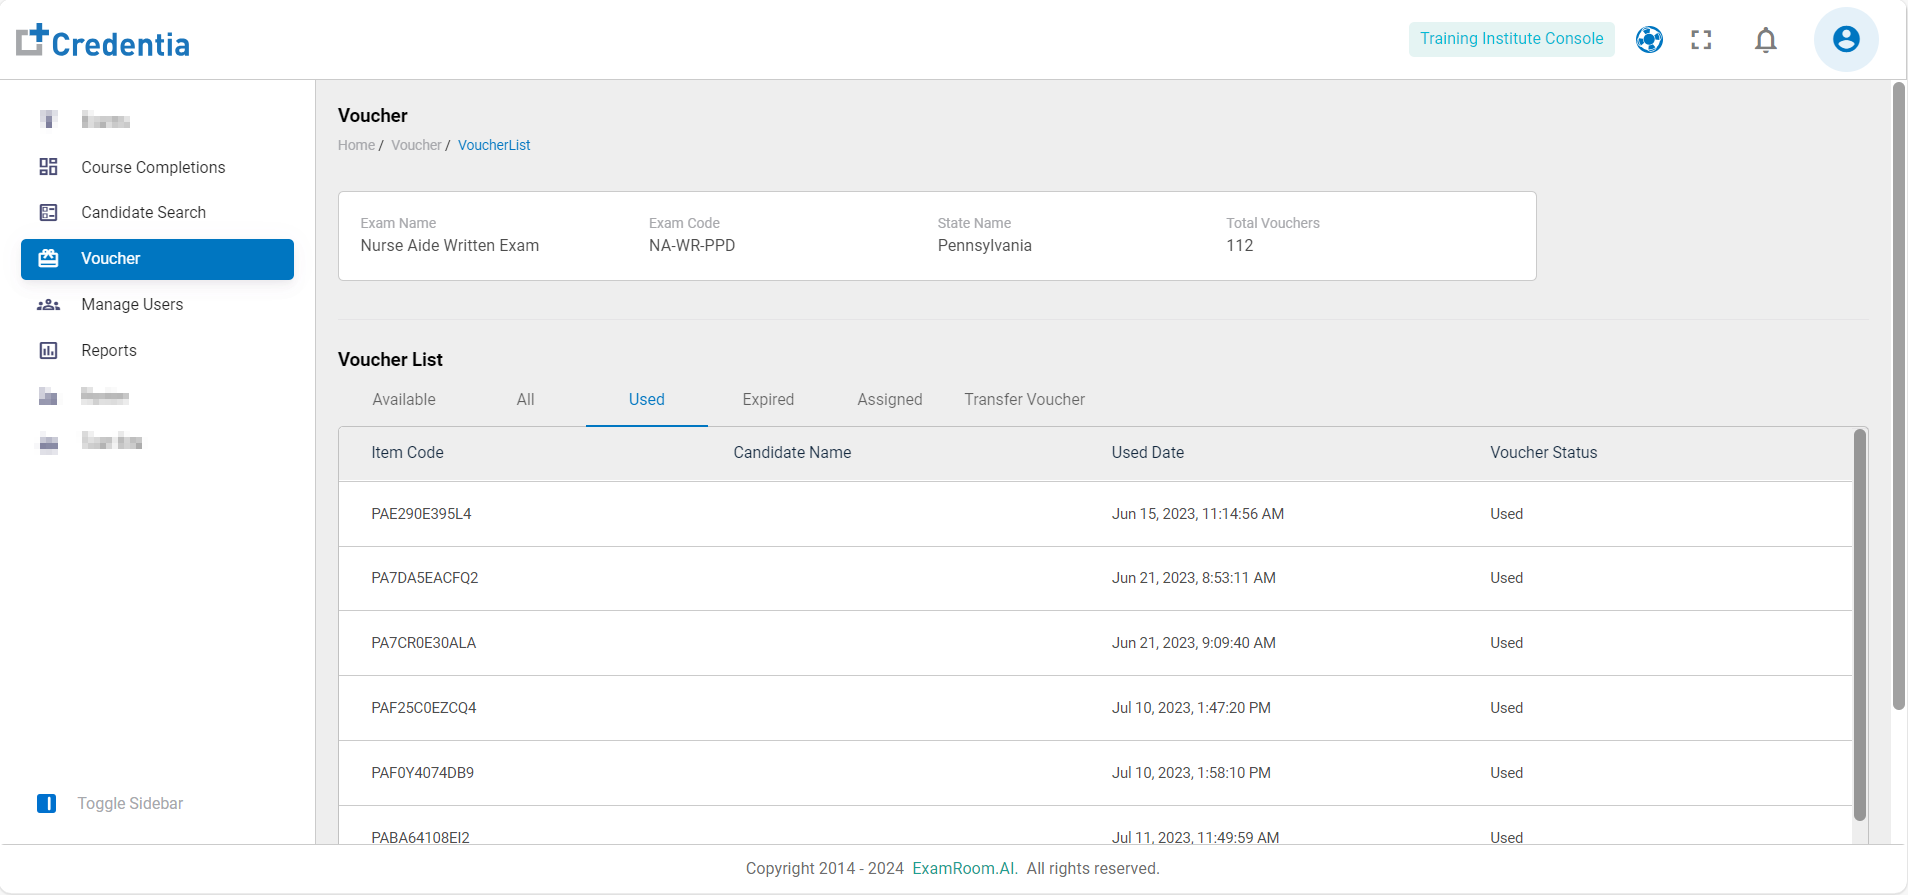
- Used Vouchers: This gives information about the used vouchers. The details of the used vouchers are as follows:
- Item Code: The code number of the voucher
- Candidate Name: This is for the display of the candidate’s name
- Used Date: The date and time when the respective voucher was utilized by the candidate
- Voucher Status: The current status of the voucher
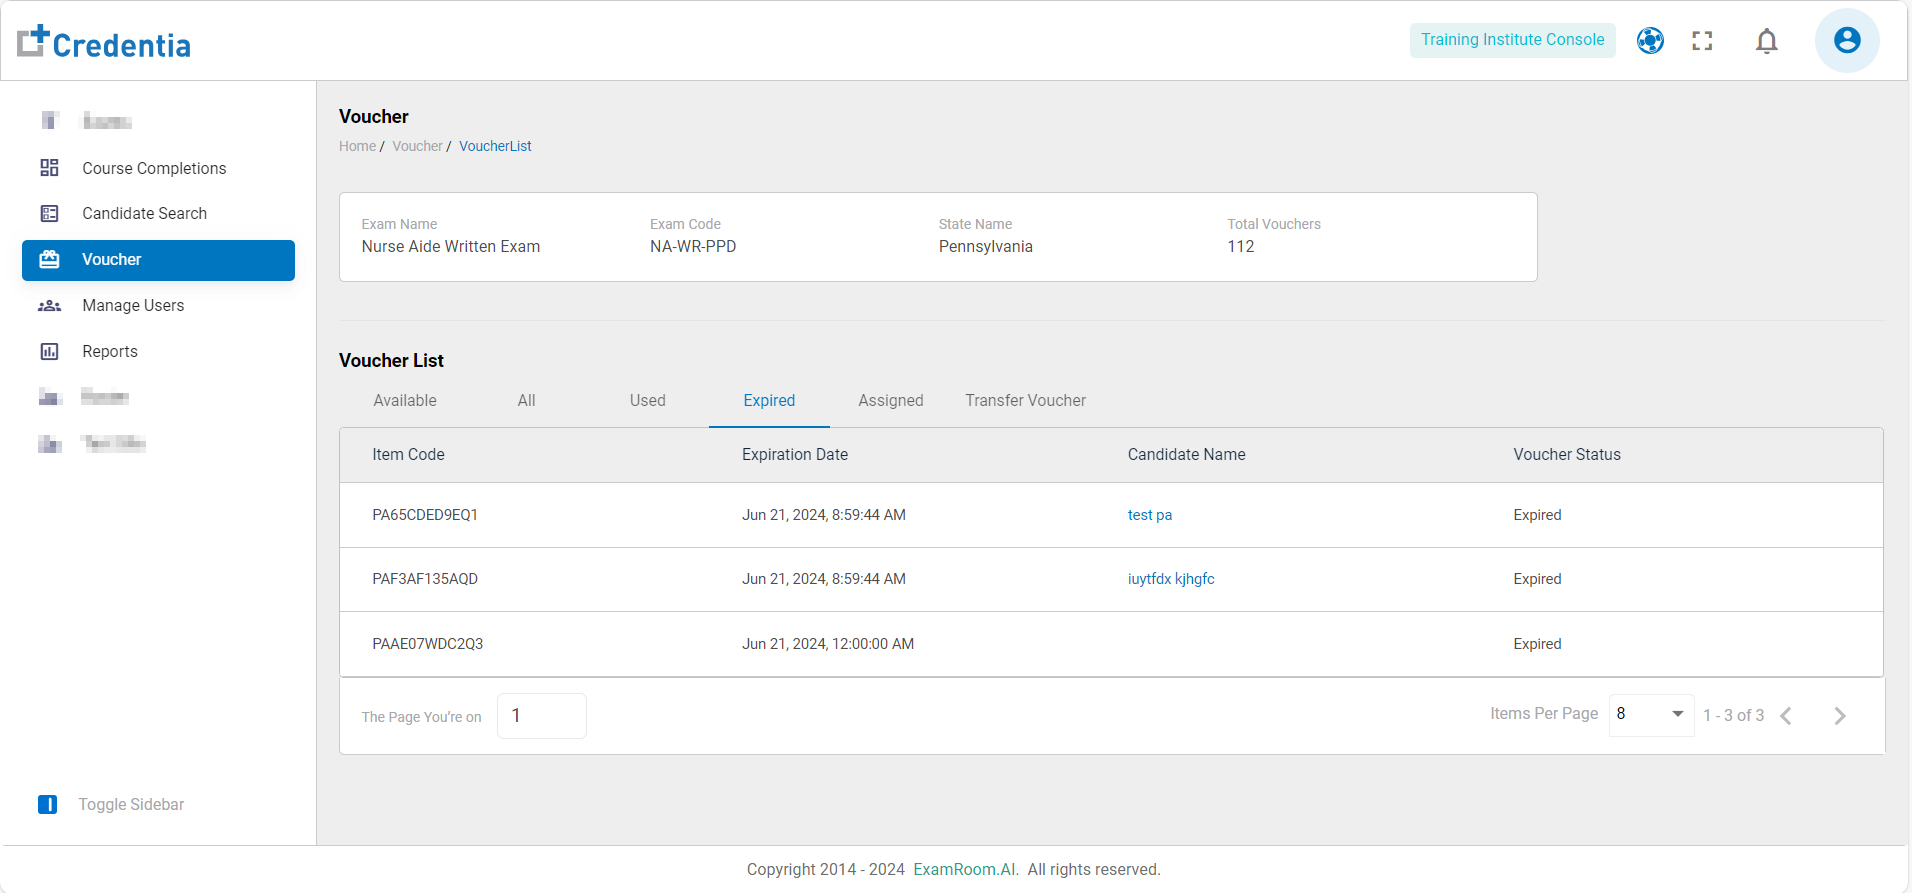
- Expired Vouchers: This gives information about the expired vouchers. The details of the expired vouchers are as follows:
- Item Code: The code number of the voucher
- Expiration Date: The date on which the voucher expired.
- Candidate Name: This is for the display of the candidate’s name
- Voucher Status: The current status of the voucher
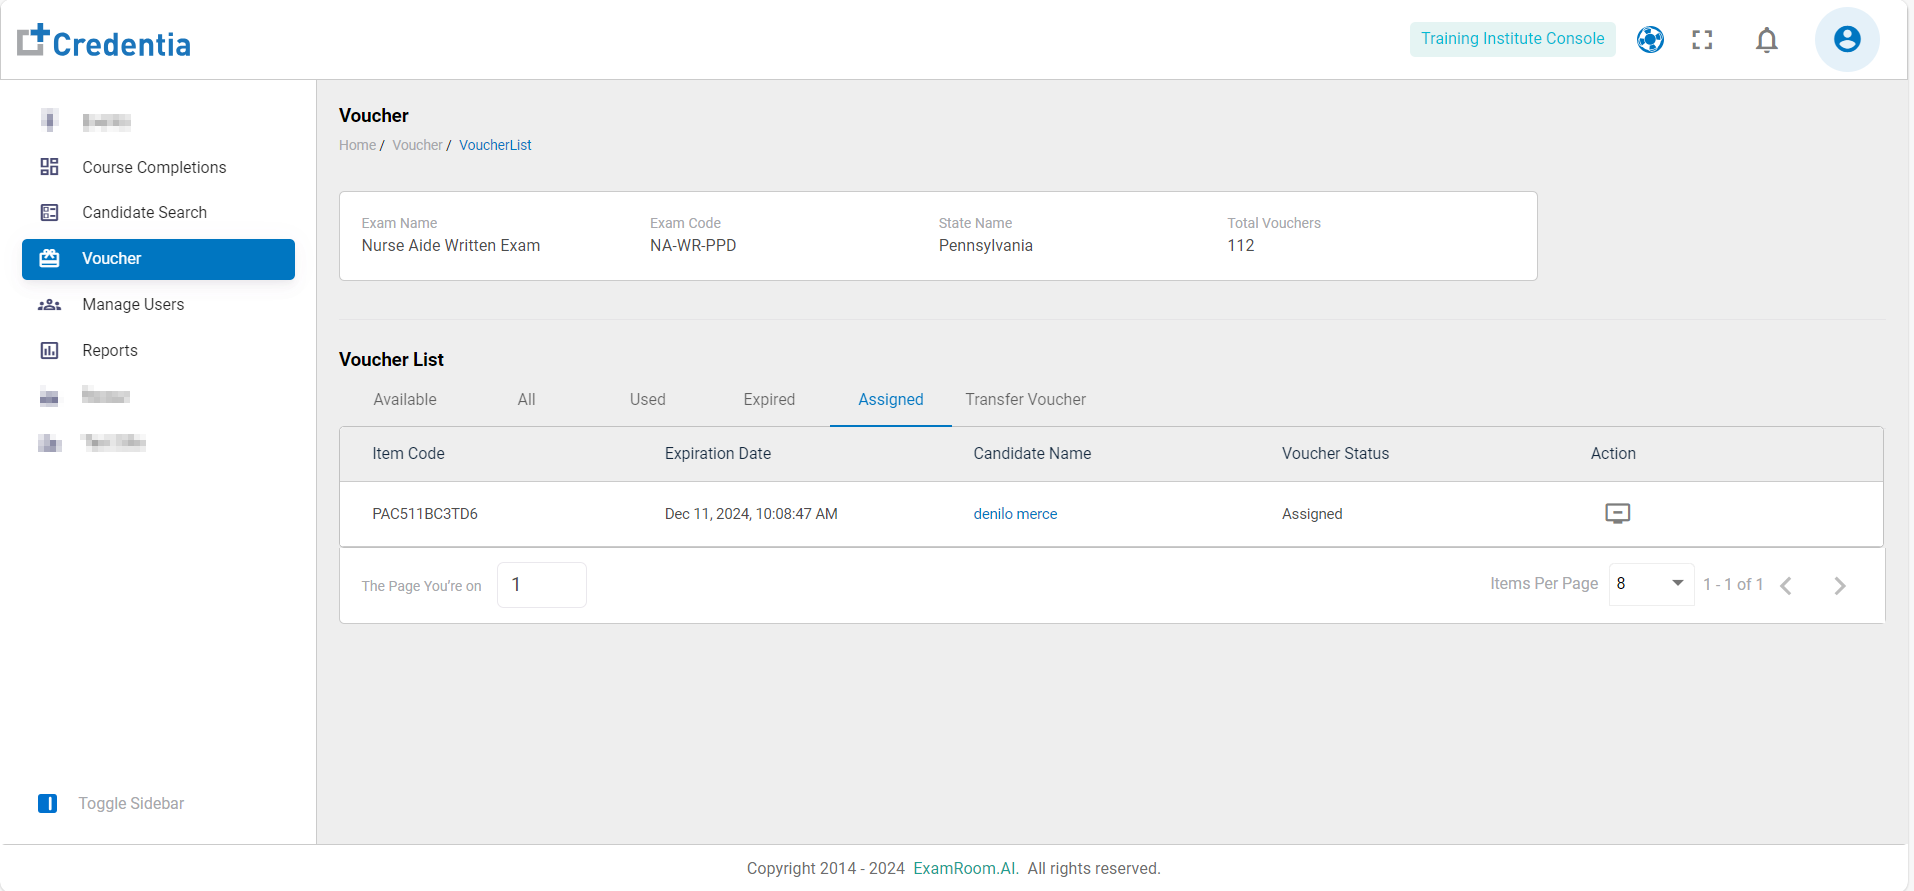
- Assigned Vouchers: This gives information about the assigned vouchers. The details of the assigned vouchers are as follows:
- Item Code: The code number of the voucher
- Expiration Date: The date and time at which the voucher shall expire. (The voucher validity will be one year from the date of purchase)
- Candidate Name: Name of the candidate who was assigned the respective voucher
- Voucher Status: The current status of the voucher
- Action: The action available on the assigned vouchers
- Unassign: Click to unassign the voucher from the respective candidate
- Unassign: Click to unassign the voucher from the respective candidate
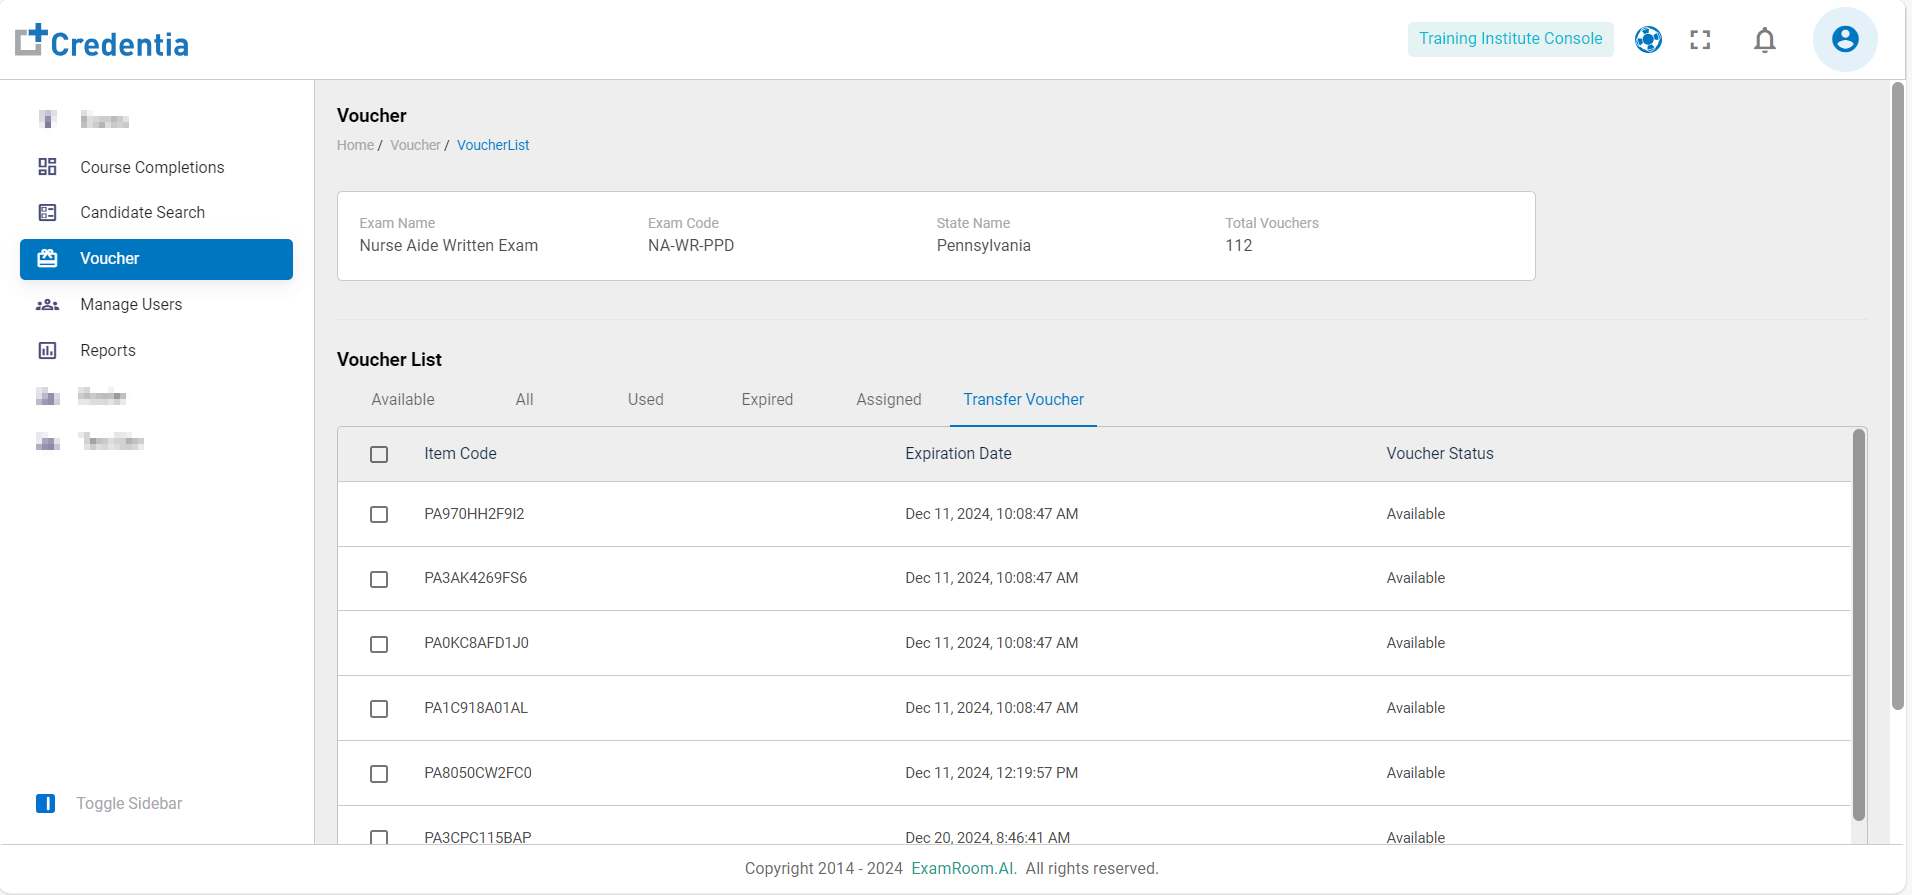
- Transfer Vouchers: This gives information about available vouchers which can be transferred. The details of these vouchers are as follows:
- Item Code: The code number of the voucher
- Expiration Date: The date and time at which the voucher shall expire. (The voucher validity will be one year from the date of purchase)
- Voucher Status: The current status of the voucher
- Available Vouchers: This gives information about the available vouchers. The details of the available vouchers are as follows:
- The vouchers can be assigned to candidates from the Available Vouchers section.
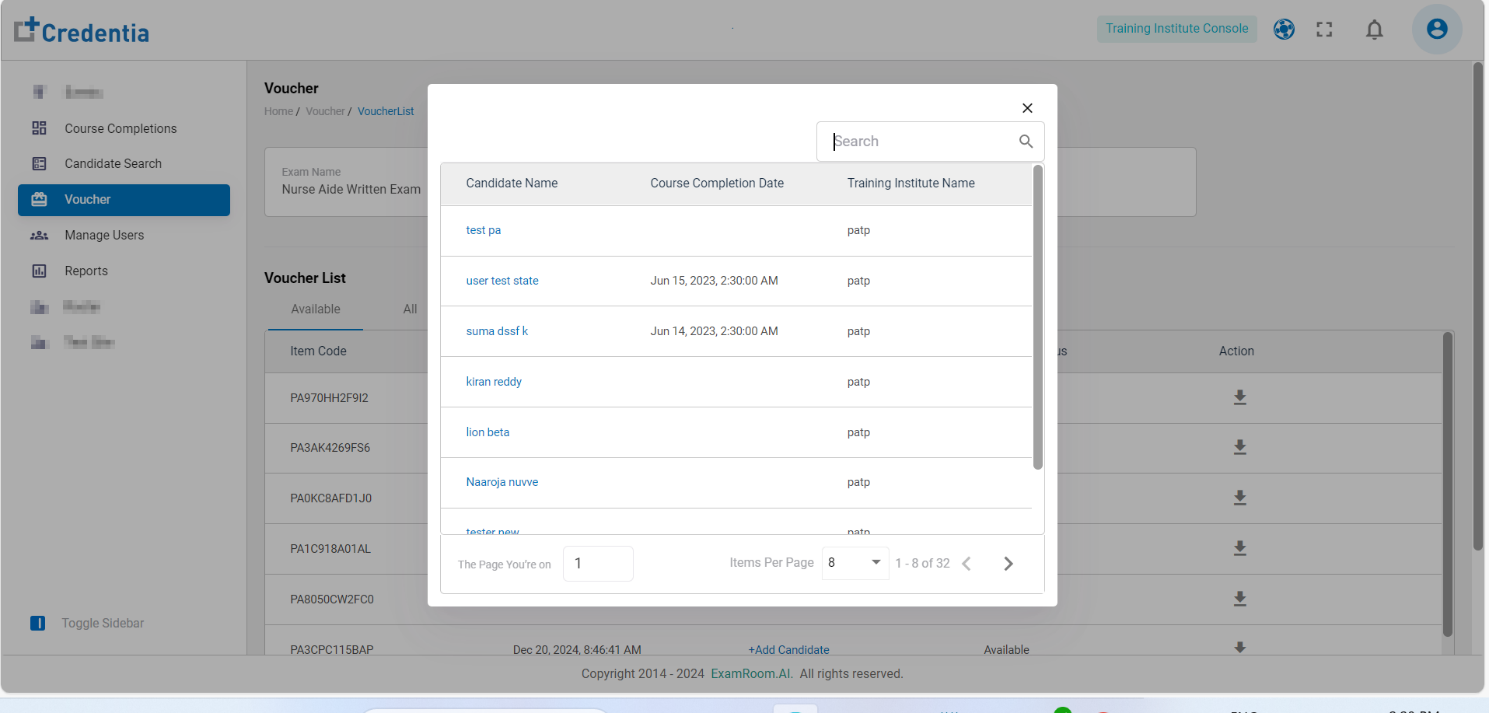
- Click on Add Candidate to assign the respective voucher to a candidate.
- The pop-up shows candidate details along with their course completion date and training institute name. Click on the search bar and type to find the desired candidate to assign the voucher to.
- Click on the candidate’s name to proceed.
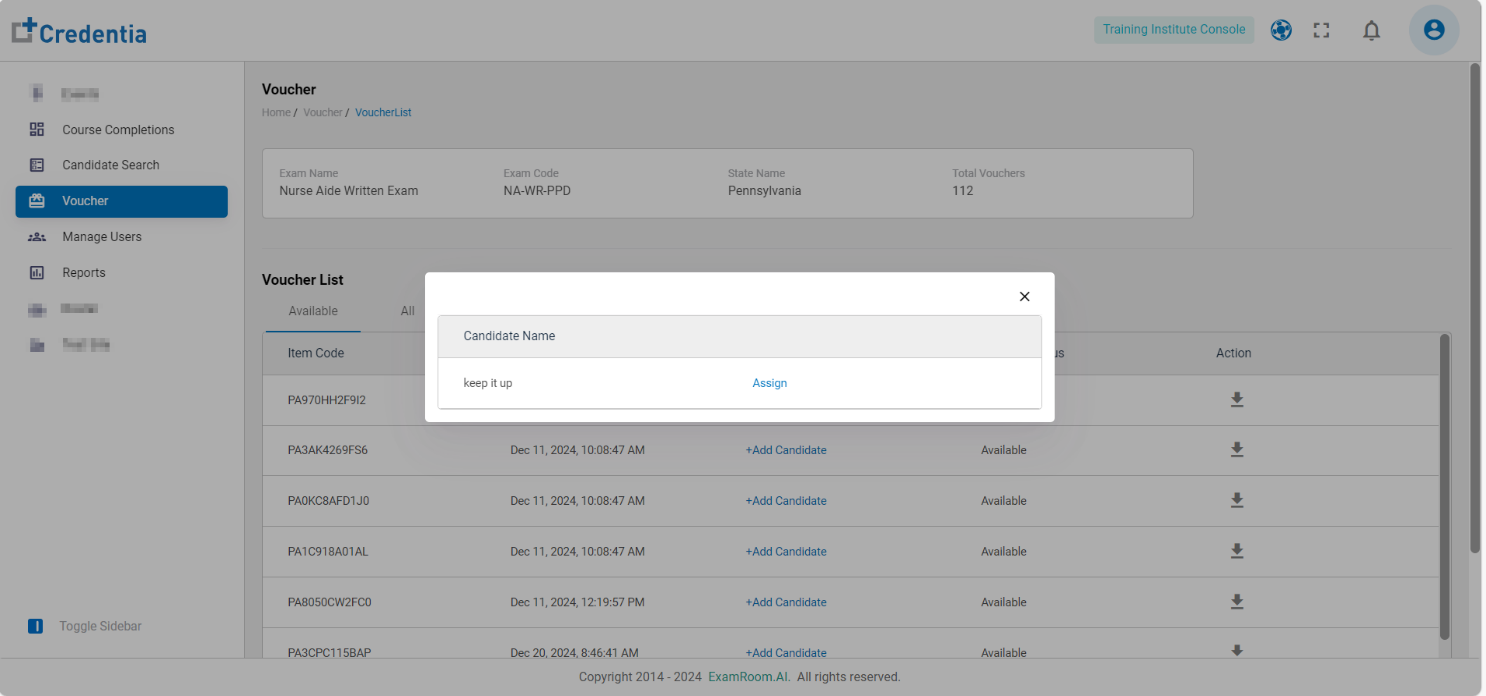
- Click on Assign to assign the voucher to the candidate.
- A pop-up at the bottom of the screen will be displayed after successfully assigning the voucher to the candidate.